Phulka recipe step by step with tips and tricks
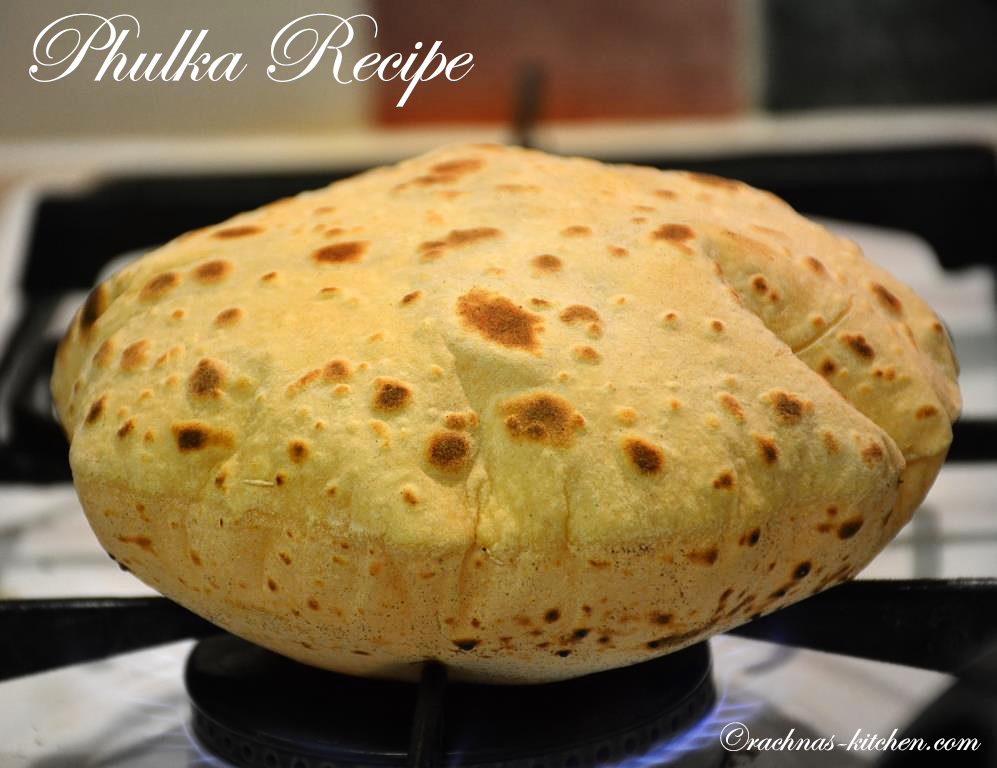
Phulka or Roti is an Indian unleavened flat bread, made with whole wheat flour. The word “Phulka” is a hindi word which means puffed, so these flatbreads are made to puff on direct flame and known as phulka roti.
Roti is a very ambiguous word in Indian cooking. As per my knowledge roti is universal name for all Indian flatbread like romali roti, missi roti, naan roti, phulka roti, makka roti and many others. Phulka are also called roti, name varies from region to region. In Gujarat these phulka are known as rotli. Size and thickness of roti also varies not only region wise but also one kitchen to another. I make these phulka almost everyday in my kitchen to serve with daal and curries.
These flatbreads tastes melt in mouth when served hot but if they are left overnight then they become chewy and rubbery. So it better to prepare them and serve them immediately.
Meanwhile check other Indian breads like naan recipe, makki di roti and laccha paratha.
 There is a lot of confusion on internet on whether Phulka/Roti and Chapati are same or not. The only difference I found is that chapati are traditionally made by patting the dough balls between the palms of the two hands and flattening it (chapat in hindi means flat). Then it is cooked on flat tawa (griddle). While the phulka are partially cooked on griddle and then cooked on direct heat which then puffs up into a ball due to accumulation of steam inside it. Once it puffs up, it is removed from heat and is ready to serve.
Chapati are generally thicker and bigger while Phulka are about 6 inch in diameter and thin.
We can prepare phulka as well on completely griddle and not using direct heat. Today I am sharing both methods of cooking phulka on direct heat and on griddle. In some countries electric gas is available so in that case phulka can be made on griddle only.
Let’s go through the recipe now !!
Ingredients
2 cup whole wheat flour
¾ cup water or more preferably warm
A pinch of salt( optional))
1 teaspoon oil (optional)
Let’s prepare phulka step by step
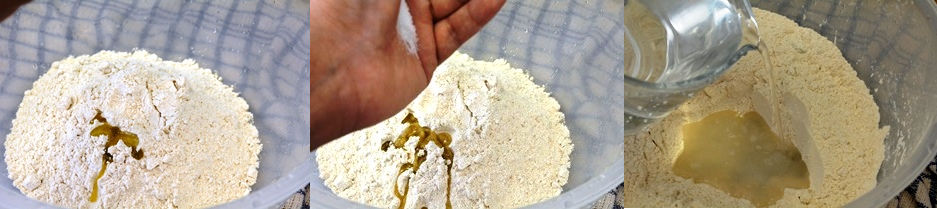
Sieve the whole wheat flour in a large mixing bowl. Add ½ tsp of oil and salt. Mix it thoroughly. Now make a well in the dough add half of the water.
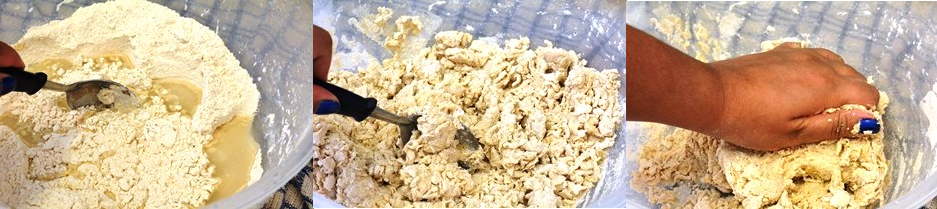
Begin to knead the dough. In starting you can do it by spoon, soon it start crumbling. Add a little more water and it slowly starts coming together in a ball. Now start kneading with your your fist and knuckles till it is soft. It took me about 12 minutes to make crack free dough. The dough should not be sticking to your hands.
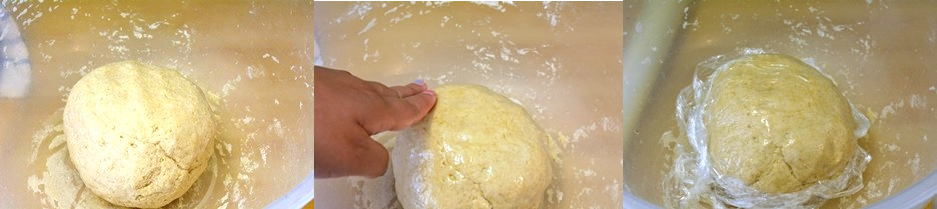
Once the dough is ready, smear remaining ½ tsp of oil over the dough. Cover the dough with cling film or a wet cloth and keep aside for at least 10 minutes to rest.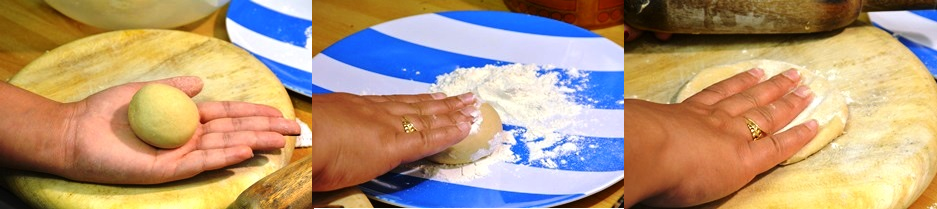
Now roll the dough into a thick log and cut 15 equal size portion. Take one dough piece and make it to a smooth ball. Flatten it lightly and coat it in flour on both sides. Keep the remaining balls covered with a damp cloth while you make the phulka. 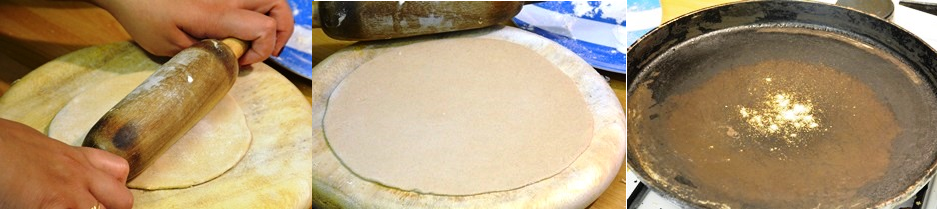
Meanwhile turn on the gas stove and put the griddle to become hot. Now start rolling them with a light hand from insideout to give a round circle. Once the skillet get hot, sprinkle a pinch of flour if it gets brown fast it means tawa is hot. 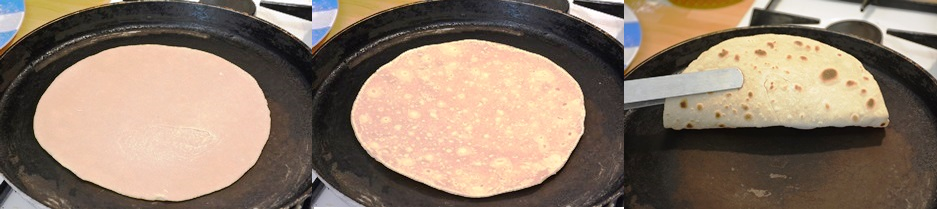
Place the roti gently on griddle. After 10 – 12 seconds flip it. Now cook the roti for one minute. Once you see there are brown spots on the under side, flip it over.
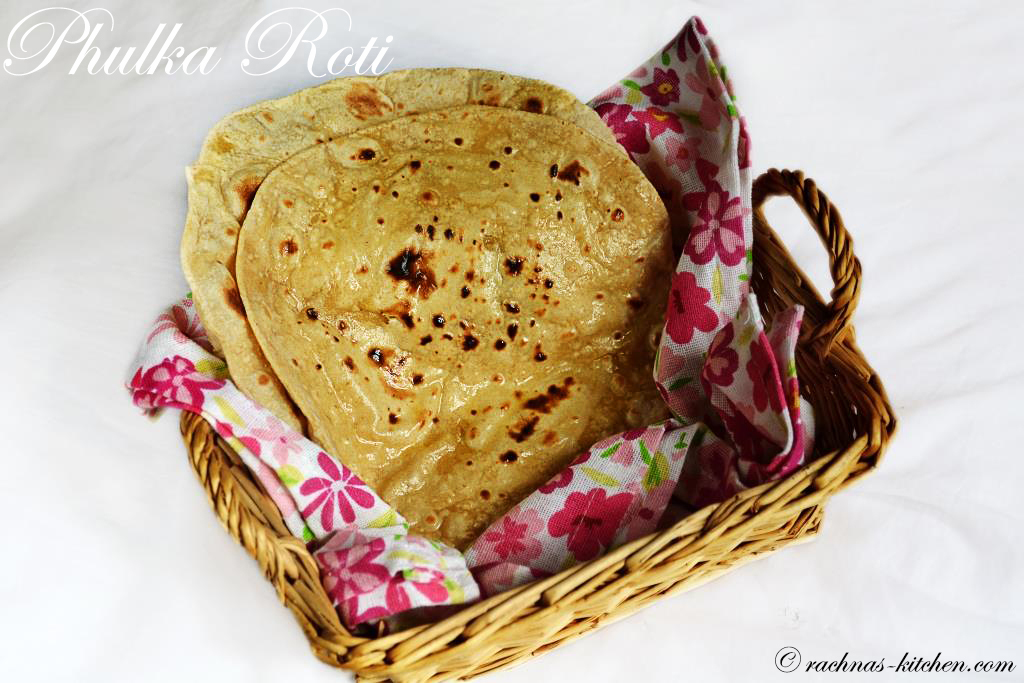
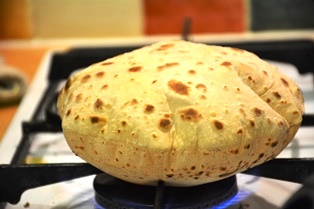 Now turn the gas on high flame and take the phulka off the griddle/tawa and place it on direct flame. Phulka roti should starts getting puffed up. Cook the roti on direct flame for 6-7 seconds and let it puffs up completely. Smear ghee or butter on top surface and keep them aside covered with cloth.
Now the second method
Roll the roti as described above. Follow the next step : Place the roti gently on griddle. After 10 – 12 seconds flip it. Now cook the roti for one minute. Once you see there are brown spots on the under side, Instead of taking roti off the griddle flip it over tawa only.
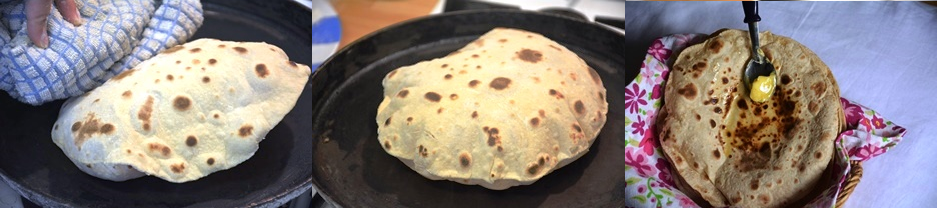
As you flip it air will start filling in it. Now you can lightly press down with a dry towel or spatula on the areas filling up so as to encourage the air to pass through the entire roti. If there is any tear or hole, press the towel on it so the air doesn’t escape. Your hot phulka is ready. Smear some butter or ghee and keep them covered with cloth.
Tips and Tricks
- Why kneading is important– In this phulka recipe to make really soft phulka, the trick lies in the kneading. The more you knead, the smoother the dough becomes and the smoother the dough is, the softer the phulka.
- Why resting time is important– After kneading resting period is very important. Resting the dough not only let’s gluten linking begin, but also allows enzymes to “transform” starches into sugars. The longer you let enzymes make sugars, the tastier the dough will be. But if you rest too long a dough, the gluten will finally get broken. The dough will look more like a puree than a kneaded dough.
- Why sometime phulka become hard and chewy – May be you have overcooked the roti (either the burner is too high or you left it on the griddle for too long). Second it can be that roti is coated in too much dry flour before putting on the griddle. To avoid sticking you may coat dough in flour again and again. That over coating creates hardness when you cook it. Third don’t try to make phulka very thin. If you make roti too thin then there are more chances of overcooking.
- In the kneading process make sure that you add right amount of water. Dough should not be too hard and not too wet. Workout well with dough.
- Water you add for kneading should be warm to make soft roti.
- If you add 2 tablespoon of milk in kneading the dough roti will be soft.
- 2 cup whole wheat flour
- ¾ cup water or more preferably warm
- A pinch of salt optional)
- 1 teaspoon oil optional
-
Sieve the whole wheat flour in a large mixing bowl.
-
Add ½ tsp of oil and salt.
-
Mix it thoroughly. Now make a well in the dough add half of the water.
-
Begin to knead the dough.
-
In starting you can do it by spoon, soon it start crumbling.
-
Add a little more water and it slowly starts coming together in a ball.
-
Now start kneading with your your fist and knuckles till it is soft.
-
It took me about 12 minutes to make crack free dough.
-
The dough should not be sticking to your hands.
-
Once the dough is ready, smear remaining ½ tsp of oil over the dough.
-
Cover the dough with cling film or a wet cloth and keep aside for at least 10 minutes to rest.
-
Now roll the dough into a thick log and cut 15 equal size portion.
-
Take one dough piece and make it to a smooth ball.
-
Flatten it lightly and coat it in flour on both sides.
-
Keep the remaining balls covered with a damp cloth while you make the phulka.
-
Meanwhile turn on the gas stove and put the griddle to become hot.
-
Now start rolling them with a light hand from insideout to give a round circle.
-
Once the skillet get hot, sprinkle a pinch of flour if it gets brown fast it means tawa is hot.
-
Place the roti gently on griddle.
-
After 10 - 12 seconds flip it.
-
Now cook the roti for one minute.
-
Once you see there are brown spots on the under side, flip it over.
-
Now turn the gas on high flame and take the phulka off the griddle/tawa and place it on direct flame.
-
Phulka roti should starts getting puffed up.
-
Cook the roti on direct flame for 6 -7 seconds and let it puffs up completely.
-
Smear ghee or butter on top surface and keep them aside covered with cloth.
-
Now the second method
-
Roll the roti as described above.
-
Follow the next step : Place the roti gently on griddle.
-
After 10-12 seconds flip it. Now cook the roti for one minute.
-
Once you see there are brown spots on the under side, Instead of taking roti off the griddle flip it over tawa only.
-
As you flip it air will start filling in it.
-
Now you can lightly press down with a dry towel or spatula on the areas filling up so as to encourage the air to pass through the entire roti.
-
If there is any tear or hole, press the towel on it so the air doesn't escape.
-
Your hot phulka is ready. Smear some butter or ghee and keep them covered with cloth.
marudhuskitchen says
a exactct phulka recipe made with easy to understand instructions thank u…
rachnaskitchen says
Thankyou Vaani !!
Nava Krishnan says
Really impressive. I don’t think I can make but would love to try.
rachnaskitchen says
Thanks Nava, its not difficult but need wee bit practice:-)
Emanuele @ guyslovecooking says
I am confused, roti, phulka, chapati. I am lost in translation
This flat bread is to die for, I tried once in London and I loved it. Not sure how authentic it was, never had before or after that day, but I truly loved it
Thanks for sharing and to bring back some nice memories
rachnaskitchen says
Thanks Emanuele for sharing your experience!!. You are right there is lot of confusion on internet about this Indian flatbread. Roti is universal name for any Indian flat bread like romali roti, naan roti, phulka roti etc..If you cook roti on griddle only without puffing is called chapatti but if you cook it partially on griddle and then puff them on direct flame it is called phulka.
Kanak Hagjer says
Wonderful post on making phulkas. Loved watching the video too. And thank you for stopping by my space the other day.:)
rachnaskitchen says
Thanks a lot Kanak for visiting my space and comment.
shubha says
Wonderfully explained rachna..lovely post!!
rachnaskitchen says
thanks Shubha 🙂
Annie @ The Garlic Diaries says
This is so cool! I love how it puffs up over the burner. I love making stuff from scratch like this :).
rachnaskitchen says
Thank you Annie for liking it 🙂
Manali @ CookWithManali says
such a simple thing but still difficult for many! your roti looks perfect Rachna 🙂
rachnaskitchen says
Thanks Manali for appreciating it:-)
Gauri says
Ahaaa… a perfect phulka… awesome 🙂
rachnaskitchen says
Thankyou Gauri 🙂
Cris says
I will try this recipe definitely. Hope it’s as good as those i ate at an indian restaurant
rachnaskitchen says
Yes try, it is a wonderful chapati. I hope it turns out great for you.
Kartikey says
Thanks alot mam .I am a student who use to live alone in a room and spend a lot of money on my food coz I dont know how to make chapattis , but after trying your trick I really made nice and soft chapattis thanks alot
rachnaskitchen says
Glad to hear that. Thanks for trying the recipe.