Aloo bhujia recipe – Crunchy mint flavoured aloo bhujia tastes absolutely delicious with a cup of tea.

I have a lot of sweets recipes on my blog but I am equally fan of savoury dishes. This aloo bhujia was on my trial list for a long time. I tried it and it came out very good in first attempt. But I felt there was some thing missing. Since I am a die hard fan of haldiram aloo bhujia and I wanted my aloo bhujia to taste similar so I gave it further try.
So here are my key observations from my attempts.
In first trial I added 1 1/2 cup potato and 1 cup chickpea flour which resulted in very wet dough. I added 1/2 cup chickpea flour more to get right consistency. Another thing was that I added mint in dough. After frying mint flavour became pale.
So in second trial I added dried mint leaves to get that minty flavour like haldiram ones. And this time aloo bhujia came very close to haldiram one.
Let’s see the recipe now.
Some other snacks recipes available on blog
2. Dahi bhalle
Ingredients
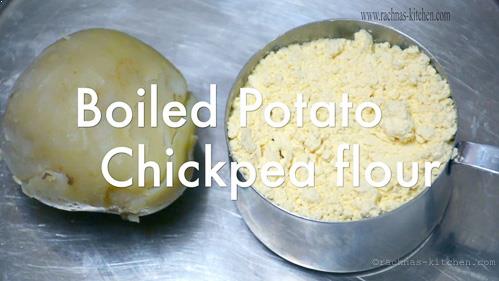
1 large boiled potato
1 cup chickpea flour
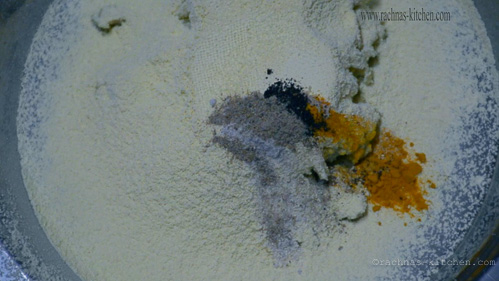
1/4 teaspoon turmeric powder
1/2 teaspoon black salt
1/2 teaspoon chaat masala
1/4 teaspoon dry mango powder (amchur powder)
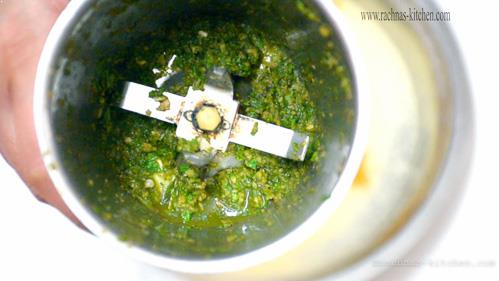
1 green chilli
1 inch ginger
1/4 cup mint leaves + 2 tablespoon mint leaves to dry roast
Oil to deep fry
Step by step aloo bhujia
Step 1. Take boiled potato and measure chickpea flour .
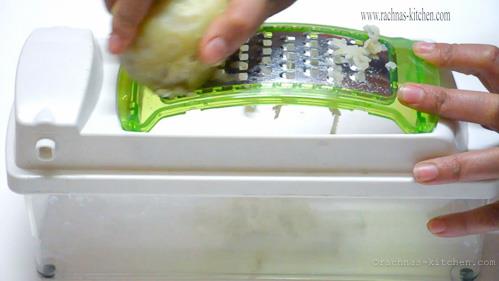
Step 2. Grate potato.
Step 3. In a large mixing bowl add grated potato. Sift chickpea flour in it. Then add turmeric powder, dry mango powder, chaat masala, black salt.
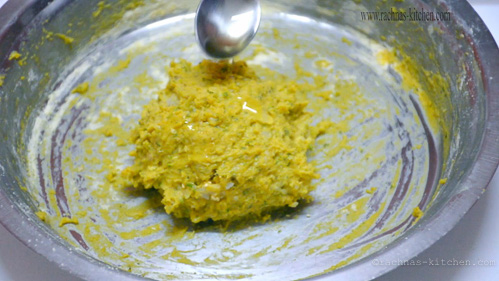
Step 4. In a mixer grinder add mint leaves, ginger and chilli. add 2 teaspoon of water and grind it to fine paste. Add this mixture to above prepared mixture. Mash with fingers to form a dough.
Step 5. Once dough is ready, add a teaspoon of oil to smear the dough.
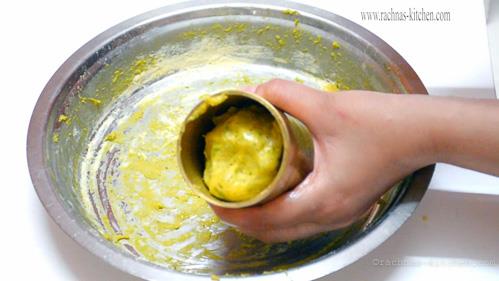
Step 6. Apply some oil in murukku maker. Give the dough a log form and put in murukku maker.
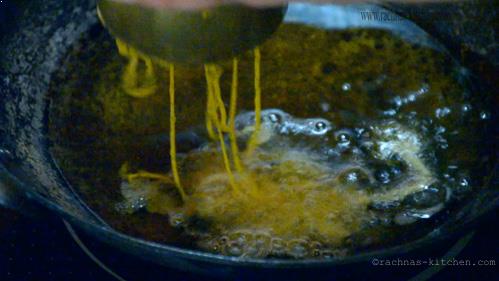
Step 7. Heat oil in a wok on medium high heat.
Press the murukku maker and spread the aloo bhujia to fry in the hot oil.
Don’t overcrowd.
Turn the heat to low and fry.
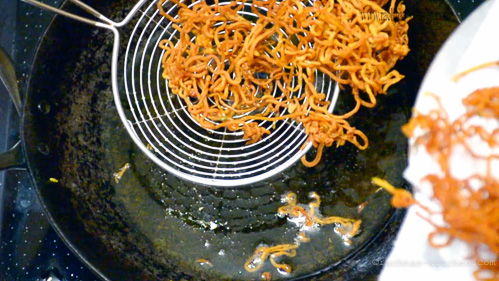
Step 8. Once they start to become golden, take them out and drain in a tissue paper.
Note – While frying in oil, if they start to hold their shape mean they have cooked enough. Keep an eye on it because once the bhujia is cooked it get burnt easily from over-cooking.
Also bhujia keep on changing colour after taking out from oil. So take them out of oil at right time.
When bhujia are taken out of oil they are moist, they later become crispy after cooling down to room temperature.
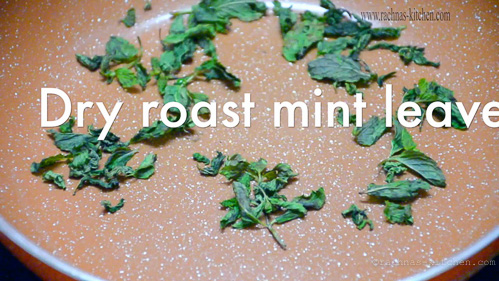
Step 9. Dry roast the mint leaves on medium heat.
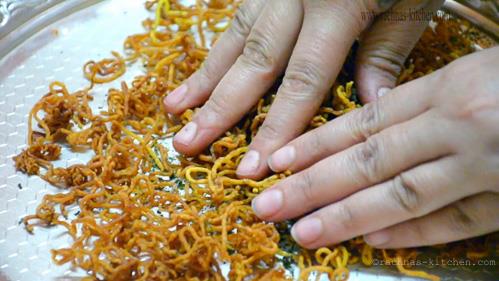
Step 10. Sprinkle chaat masala and crushed roasted mint leaves on bhujia.
Then softly break the aloo bhujia and transfer to air tight container.
Recipe card – Aloo Bhujia
- 1 large boiled potato
- 1 cup chickpea flour
- 1/4 teaspoon turmeric powder
- 1/2 teaspoon black salt
- 1/2 teaspoon chaat masala
- 1/4 teaspoon dry mango powder amchur powder
- 1 green chilli
- 1 inch ginger
- 1/4 cup mint leaves + 2 tablespoon mint leaves to dry roast
- Oil to deep fry
-
Take boiled potato and measure chickpea flour .
-
Grate potato
-
In a large mixing bowl add grated potato. Sift chickpea flour in it. Then add turmeric powder, dry mango powder, chaat masala, black salt.
-
In a mixer grinder add mint leaves, ginger and chilli. add 2 teaspoon of water and grind it to fine paste. Add this mixture to above prepared mixture. Mash with fingers to form a dough.
-
Once dough is ready, add a teaspoon of oil to smear the dough.
-
Apply some oil in murukku maker. Give the dough a log form and put in murukku maker.
-
Heat oil in a wok on medium high heat.
-
Press the murukku maker and spread the aloo bhujia to fry in the hot oil.
-
Don't overcrowd.
-
Turn the heat to low and fry.
-
Once they start to become golden, take them out and drain in a tissue paper.
- While frying in oil, if they start to hold their shape mean they have cooked enough. Keep an eye on it because once the bhujia is cooked it get burnt easily from over-cooking.
Also bhujia keep on changing colour after taking out from oil. So take them out of oil at right time.
When bhujia are taken out of oil they are moist, they later become crispy after cooling down to room temperature.
Step 9.
Dry roast the mint leaves on medium heat.
Step 10.
Sprinkle chaat masala and crushed roasted mint leaves on bhujia.
Then softly break the aloo bhujia and transfer to air tight container.
Leave a Reply